

I wanted this post to be a recipe.. something beautiful and seductive to make your mouth water and fill your belly. But it has been too hot to think about kitchens and ovens and stoves, and these hot humid days have me grabbing the easiest thing I can to gobble down. Thus, here is a recipe of a different sort. All of my favorite “ingredients” to create the perfect embroidery kit.
For me, embroidery has always been the perfect craft for rainy days like today. It is portable, inexpensive, accessible, and the perfect project to make just about anywhere. Can I make this project in bed surrounded by a pillow fort? Can this project tuck into a backpack and be made on a plane? Does this project use minimal/inexpensive supplies? Yes, yes, and yes! Years ago, my good friend Jessica introduced me to embroidery. It was a day I wasn’t feeling my best, but still wanting to spend an afternoon together doing something creative. She picked up a pack of needles, a cheap pack of embroidery floss, a bit of fabric and a couple of embroidery hoops. For under $10 we had all we needed to stitch away for hours and that sparked many more years of embroidery projects for me.
Over the years, I’ve honed my embroidery kit to one that works great for me and I am so excited to share all my favorites so you can start a kit of your own. This is an exhaustive list of supplies I use and I find the kit is still minimal. You definitely do not need everything listed, but start with the essentials (hoop, fabric, desired thread, snips, #2 pencil, and a needle) and your kit can grow as your project needs evolve.

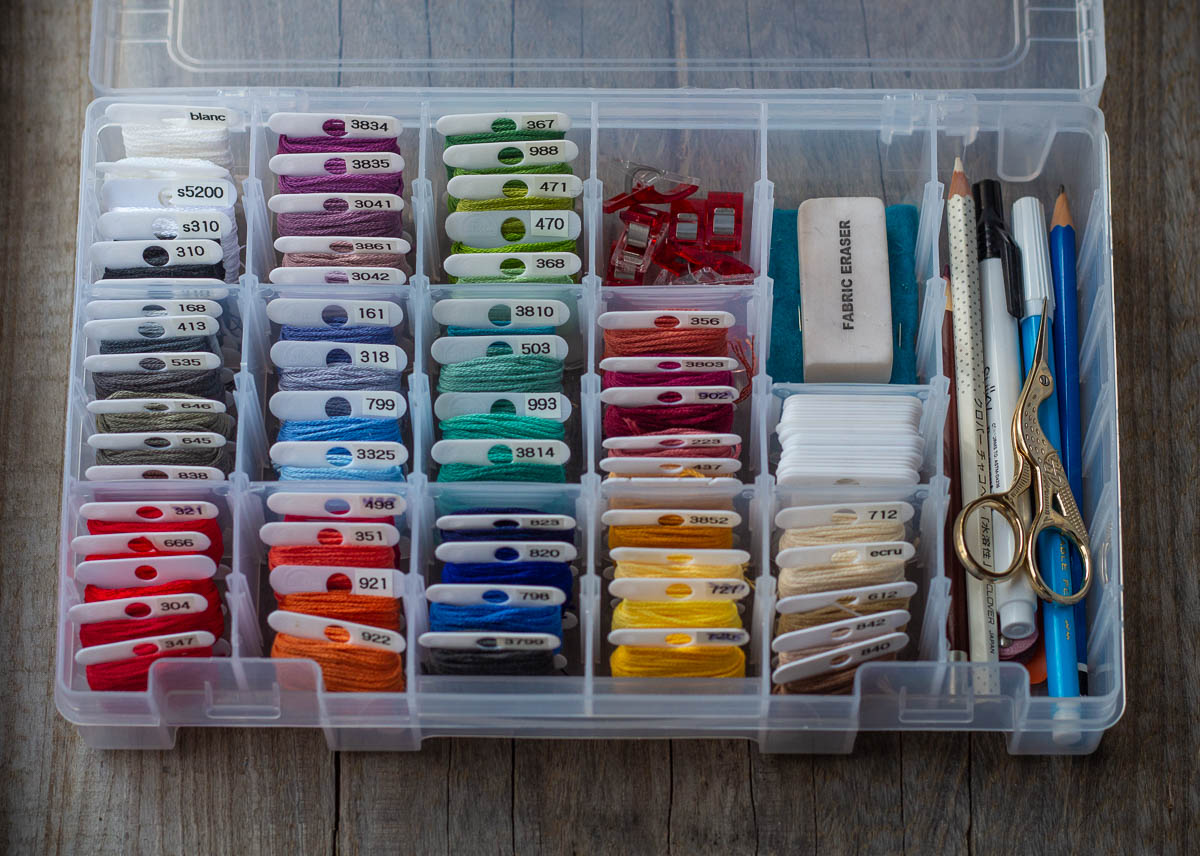
PLASTIC EMBROIDERY BOX BY ART BIN - So far, this has been my favorite box to use. The slots are customizable and I love the secure latches. I keep thinking I'd love to make something handmade out of wood, but that would only heavy the load and what's fantastic about embroidery is the portable nature of supplies and keeping it light and easy.
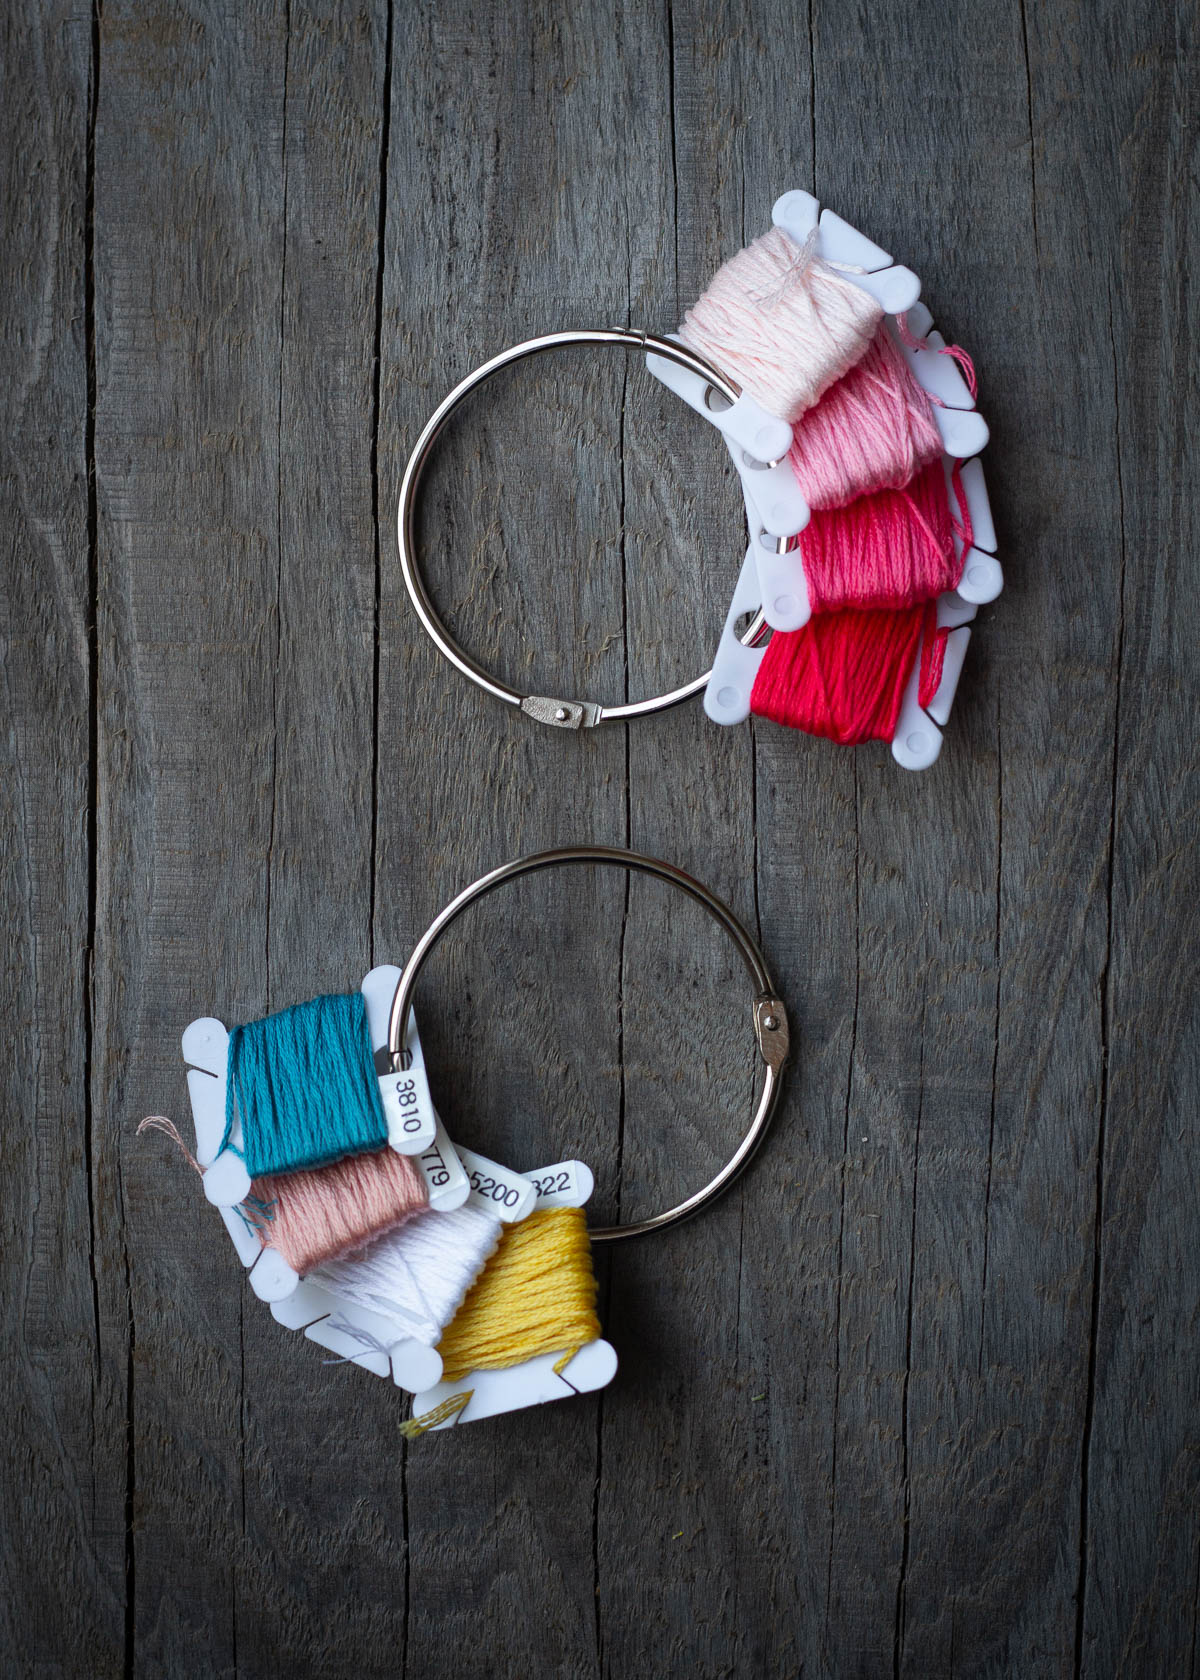
EMBROIDERY FLOSS BOBBINS WITH METAL RINGS - Floss bobbins come in plastic or cardboard. I've even used bamboo clothespins or you can make your own bobbin by tracing onto cardboard. However, I find the plastic ones to work the best since they can be reused indefinitely and hold up well over time. I'm new to using metal rings for my projects, but I found this to be an excellent way to organize my projects! I love to keep all the thread colors for one project on a single ring and store it in a tiffin box with essentials such as a pair of snips and needle which make my projects even more lightweight, portable, and organized.
DMC EMBROIDERY FLOSS - When I first began embroidery, I started with the least expensive packs of colored floss because that was the most cost-effective and completely fine for my projects. As I began to embroider more, I shifted over to growing my supply of DMC embroidery floss. I find that this brand of floss gives me a much smoother and shinier clean finish to my projects. I still have loads of stash of less expensive embroidery floss and I'm utilizing those to put together a beginner kit for my niece. She is thrilled.
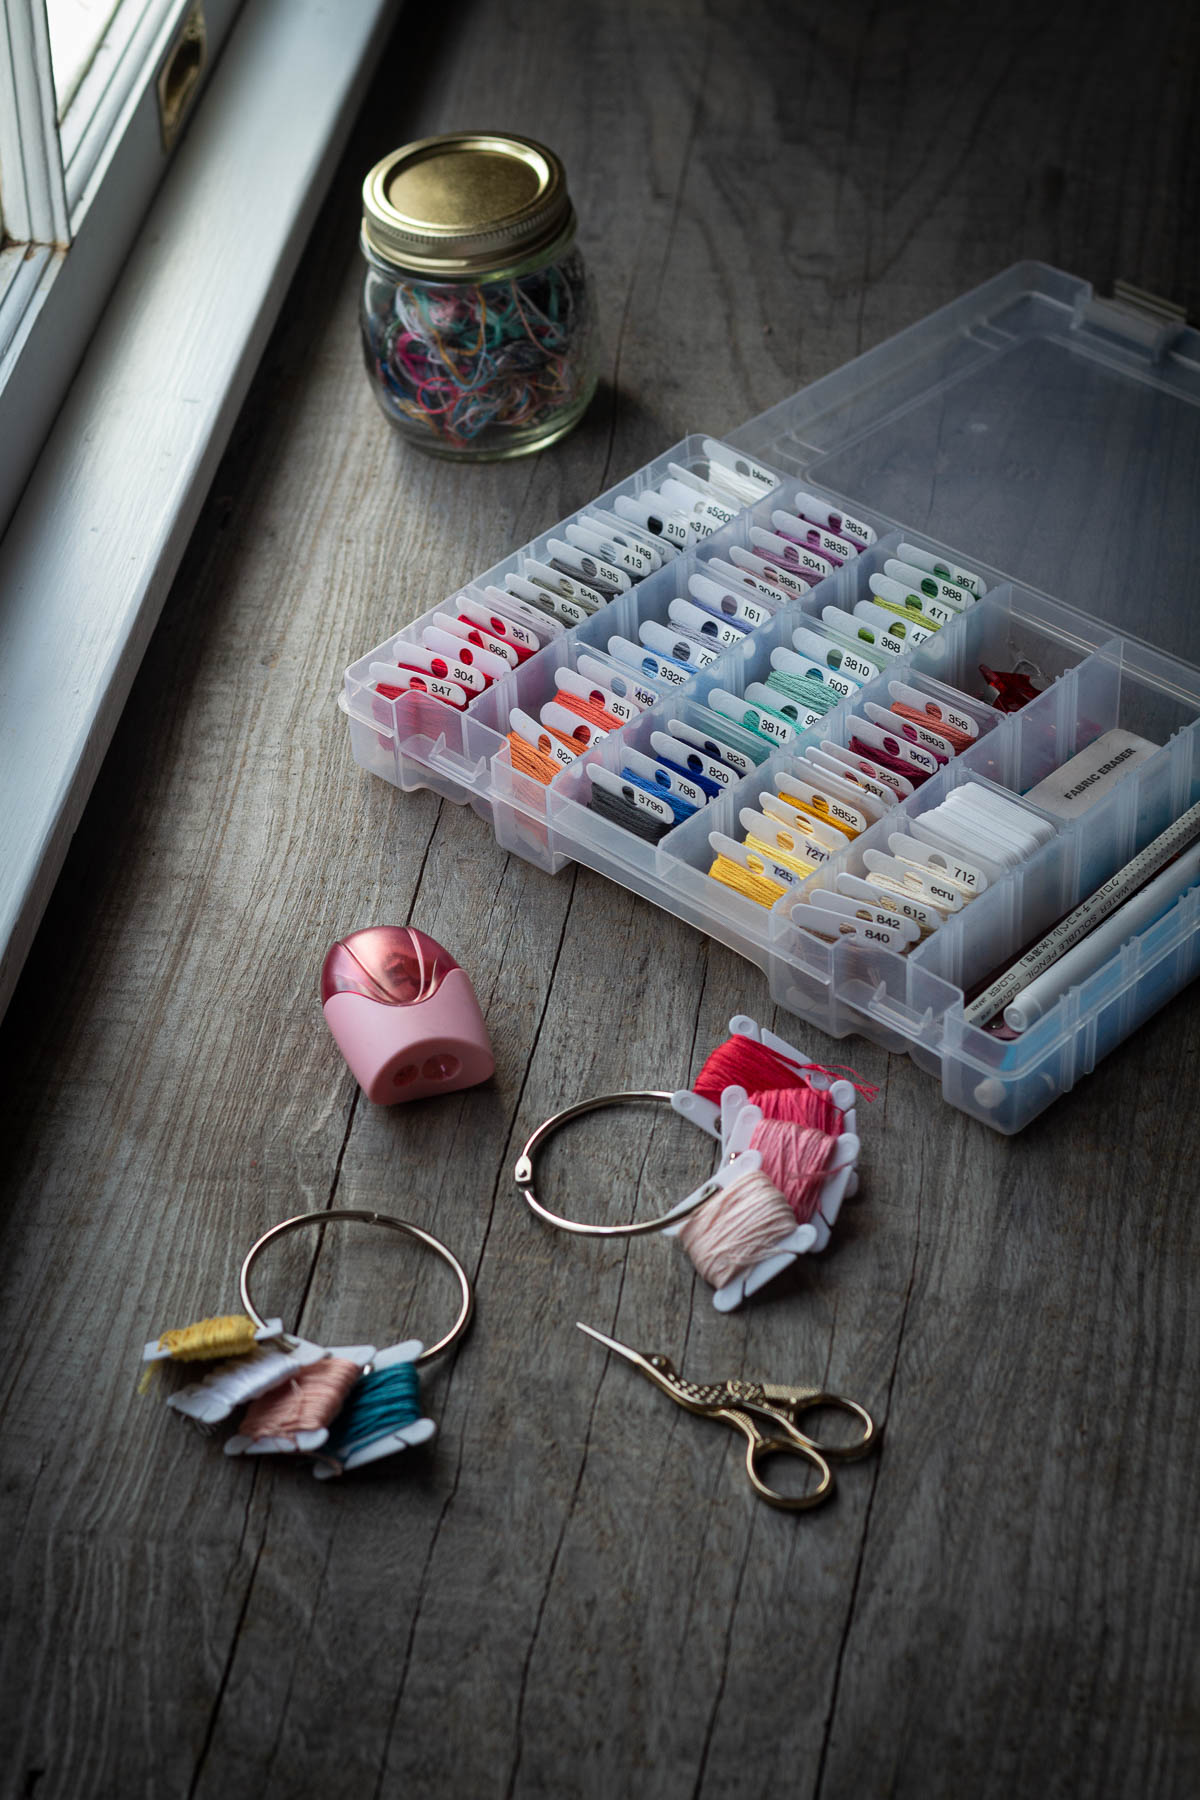
EMBROIDERY SNIPS - When I started, I used my small pair of sewing scissors as snips. Scissors work just fine as well. However, having a small pair of snips in your kit is worth the few dollars. While my gold stork scissors are adorable, my favorite pair to use is the pink snips because I don't have to spend extra time getting my fingers in the holes. They're easy to grab, snip a thread end, and toss back into my tiffin box.
NEEDLE NOSE PLIERS - Many may be surprised to see pliers in an embroidery kit, but I've found these to be essential in larger projects with lots of heavy thread overlap. The thread begins to get thick and I have a hard time pulling the needle through. A quick grab and pull with the pliers makes a painful frustration easy peasy.
EMBROIDERY NEEDLES - You'll find embroidery needles in many sizes. I often choose a pack that has a decent size hole opening that easy to slip my floss through. Not too big and not too small tends to be perfect for most applications. Find what works for you.


FELT SQUARE FOR HOLDING EMBROIDERY NEEDLES - A simple snipped square of felt works as perfect storage for embroidery needles. They tuck away nicely into your embroidery box or tiffin box.
NEEDLE THREADER - I don't use a needle threader often, but every once in a while I find it can be a helpful tool. And since embroidery supplies are fairly inexpensive and it's such a tiny tool, I thought it was a great idea to add to my kit.

ROUND TIFFIN BOX - This is a new addition to my embroidery kit this year after a friend of mine KonMari'd his home and I inherited this sweet tiffin box. What didn't "spark joy" for him did for me and found a new purpose and home. Don't you love that?! It turns out to be a great way to store my supplies for my current working projects. I keep only the thread I need for a particular project on a ring along with snips and needles and it keeps working projects minimal. So easy to tote along or reach for just the essentials to work on a project
JAR FOR CATCHING SNIPPED THREAD - I used to have a mess of thread bits everywhere to clean up, but over time found it so nice to have a beautiful jar (that was gifted to me by my aunt) to collect threads. It keeps the mess non-existent while working and also acts as it's own art. I love the thread story and colors and sometimes set it out to display on a shelf.
LABEL MACHINE / DMC FLOSS NUMBER STICKERS - One easy evening I decided to use a labeler to batch label my floss bobbins. A much easier way is to use the DMC floss number stickers and even easier is to use a permanent marker. This works so nicely to keep floss organized and easy to find.

PATTERN TRANSFER TOOLS:
There are many different methods for transferring patterns onto fabric for embroidering depending on the fabric you are using and detail of design, which will make itself evident as to which transfer method will work the best for your project. These are some of the tools I use to make that process as easy as possible.
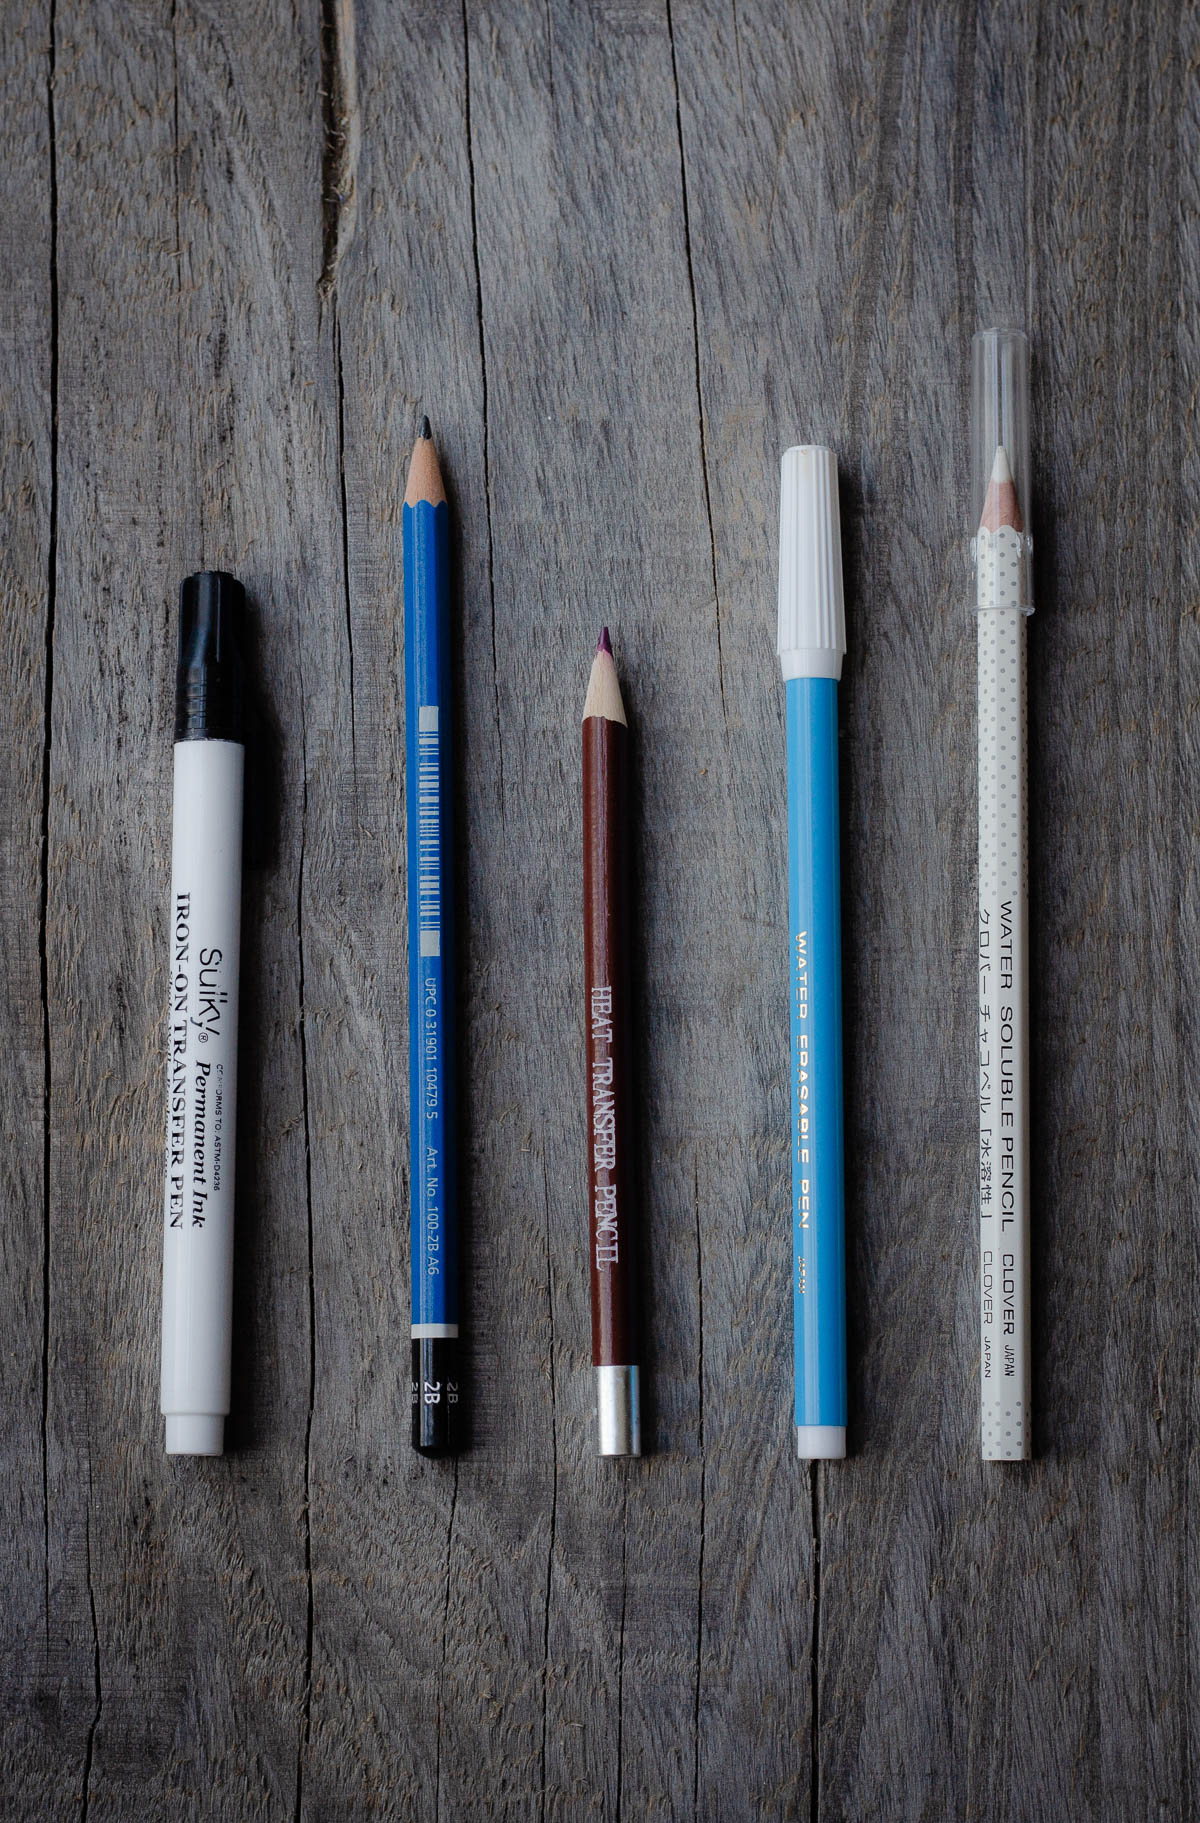
Many times I use my MacBook as a light-box of sorts and gently trace the pattern onto the fabric. When using this method, a handful of CLOVER WONDER CLIPS easily help me to secure my fabric to my MacBook screen. This works best on fabric that is thin enough to see through in order to trace the pattern. Then, I'll bump up the screen brightness and use the blue EMBROIDERY TRANSFER pen in order to trace my design. This works great for most applications and a little water will easily dissolve any stray lines. For other applications, I've enjoyed using the SULKY IRON-ON TRANSFER PEN. The lines are a bit thicker on this pen, but it's great to trace designs onto paper and iron on to your fabric. It produces strong clear lines that are easy to stitch over. The HEAT TRANSFER PENCIL works nicely as well but can achieve a much finer line than the iron-on pen. Keeping this pencil in the freezer can help keep a strong crisp point because the lead is soft and breaks easily. A simple PENCIL is always a handy tool to have for writing or transferring patterns. You can tape your pattern up to a window, light-box, or makeshift light-box in order to transfer patterns and a FABRIC ERASER helps with any mistakes. A CLOVER WHITE WATER-SOLUBLE PENCIL works great on darker fabrics that are still a bit see-through with a light source or for hand drawing a pattern. A small PENCIL SHARPENER is also a great kit add-in to have your writing/transfer pencils always sharp and ready.

WOODEN EMBROIDERY HOOPS - Embroidery hoops are wonderful because they come in a variety of sizes and are inexpensive, costing only a few dollars or less. You can purchase these individually as needed for each project and are simply work by sliding in fabric and tightening the screw. They can also be stained or painted for a variety of finishes to complement your embroidery.
FABRIC (medium weighted muslin for beginners or cotton twill) - When I began stitching, my go-to was a heavier weighted muslin. It was extremely cost-effective and easy to work with in terms of stitching and transferring patterns, and I liked the look of the fabric. Cotton twill is also a favorite of many embroidery artists. I’d recommend to steer clear of too heavyweight or too thin of fabrics as it will be difficult for transferring patterns and stitching.
Once you've gathered a few supplies for your kit, you're ready to begin stitching. You can create your own patterns or find lovely free patterns on the DMC website. Even better, support small independent artists by purchasing downloadable patterns or stitch kits from some of my favorite creators such as EmillieFerris, MiniatureRhino, floralsandfloss, and StudioMME.
Happy Stitching!